Artificial Grass Installation in Poway, CA
Enter your city, state to get soil-based installation recommendations.
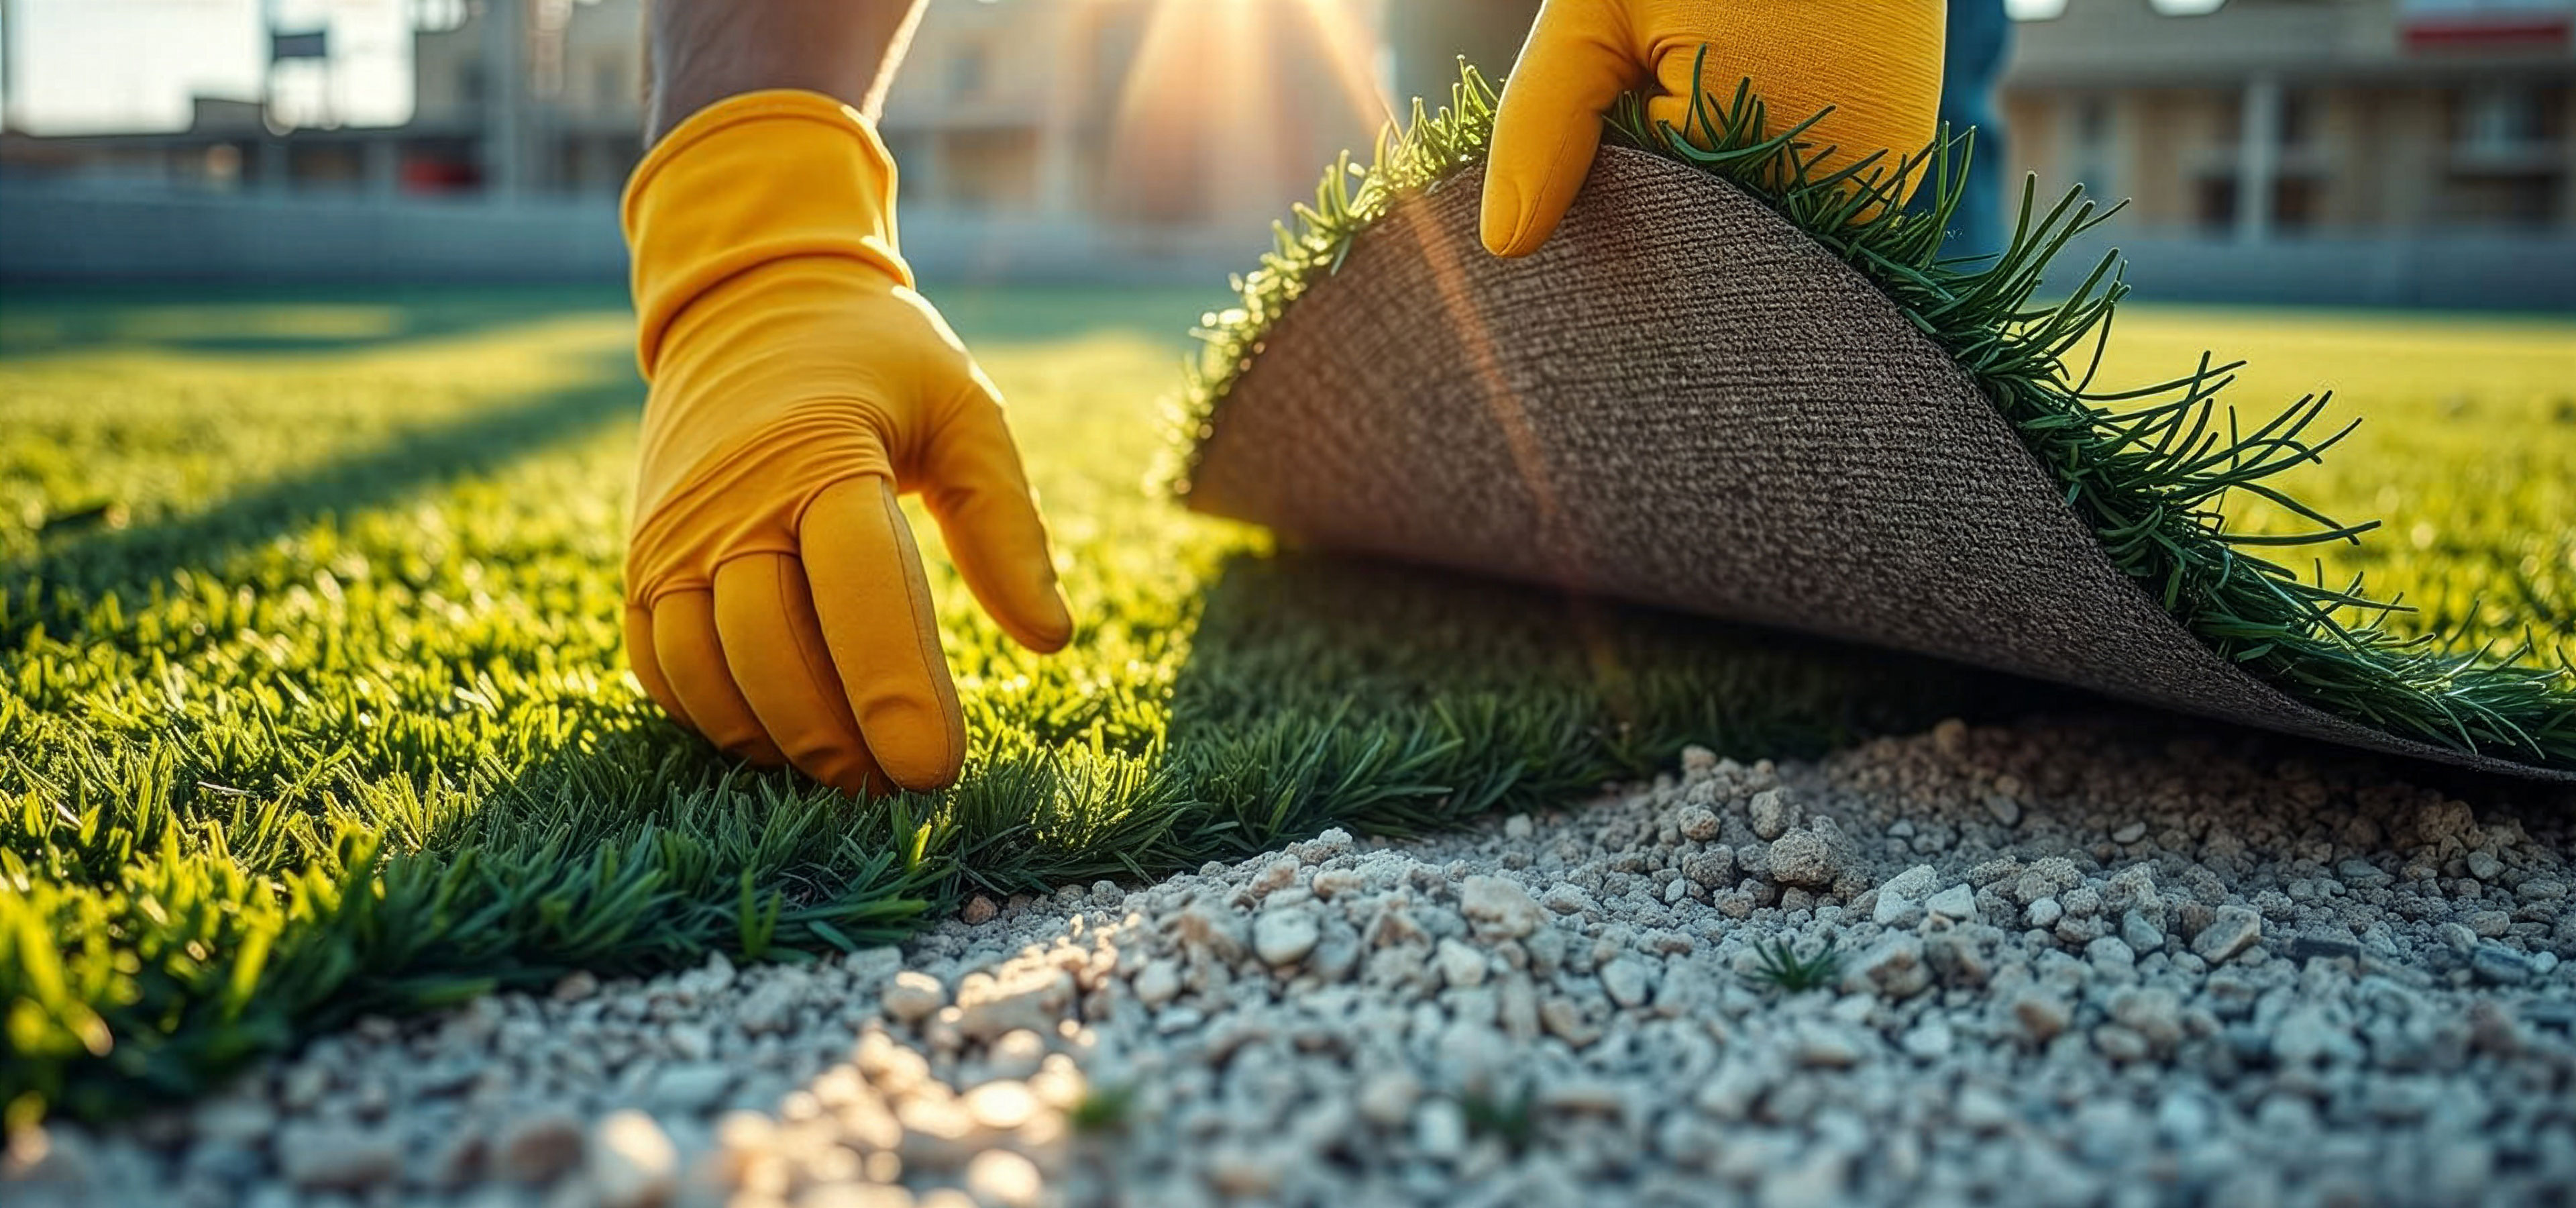
How to Install Artificial Grass in Poway, CA
Plan the installation and measure the area accurately to determine material requirements. Proper measurements help reduce waste, guide layout direction, and ensure all turf sections align consistently.
Excavate 4-5 inches of grass, sod, and loose soil. Adjust depth as needed to accommodate the base system and turf thickness for proper final grade. Clear debris, roots, and organic material. For larger areas, use a sod cutter to speed up removal. Cap and remove irrigation components (any sprinklers or sprinkler heads) if present.
Establish a rough grade at this stage to support drainage and prepare for base installation.
Inspect the exposed soil before installing base materials. In Poway, CA, subgrade conditions are typically E20-maritime forest-organic slopes, with well drained drainage and a composition of approximately 67.40% sand and 13.00% clay.
Under these conditions, water tends to drain at a moderate and stable rate, which can affect both drainage and long-term base stability. Even soils classified as Well Drained may behave differently depending on clay content or underlying layers, so actual field conditions should be verified before installation.
If the subgrade is soft, moisture-retaining, or prone to movement, additional grading, compaction, or a geotextile separation layer may be required to create a stable and consistent foundation.
Install protective layers before placing base materials when site conditions require it.
Gopher wire can be installed to prevent burrowing animals from damaging the turf system.
- Lay wire across the entire exposed surface
- Extend wire up along the perimeter edges
- Create a continuous barrier (“cage”) with no exposed soil
This step is optional and typically used in areas with known pest activity.
Edging is installed to define the perimeter and contain the base.
- Common materials: bender board (1×4, 2×4) or metal edging
- Helps maintain clean edges
- Prevents base migration and turf movement over time
Proper edging improves long-term structural integrity and installation accuracy.
Lay 3-4 inches of crushed angular aggregate as the primary base layer.
Position turf sections before cutting to ensure proper alignment and minimize visible seams. Minimizing seams during layout improves overall appearance and reduces visible transitions.
Helpful Tip
Before installation, unroll the turf with blades facing down and allow it to sit in the sun for 1–2 hours.
- Relaxes backing material
- Reduces wrinkles and memory
- Makes cutting and positioning easier
Layout & Alignment
-
Roll out turf sections
Place turf according to layout plan before making any cuts.
-
Remove manufacturer edges
Trim factory edges using a turf knife. Cut from the backside, removing approximately 3 stitch rows to create clean seam edges.
-
Align grain direction
Ensure all turf pieces run in the same direction.
- Blades should lean consistently
- Stitch rows should match
Misaligned grain will cause visible color variation and uneven appearance.
Cut and join turf sections carefully to ensure clean seams, proper tension, and long-term stability.
Cutting
- Cut turf from the backside using a sharp turf knife.
- Trim edges cleanly along stitch rows for accurate alignment.
- Avoid cutting from the top to prevent uneven blade edges.
Seaming (When Multiple Pieces Are Used)
-
Dry fit the seam
Position turf sections exactly before applying adhesive. Ensure edges align naturally with consistent blade direction.
-
Prepare seam base
Place seaming tape centered beneath the joint.
-
Apply adhesive
Spread a thin, even layer of glue. Avoid excess adhesive that could rise through drainage holes.
-
Join turf edges
Lay both edges onto the adhesive with a small gap (~1/8") to prevent overlapping fibers.
-
Secure the seam
Press firmly and allow adhesive to cure. Remove any excess glue immediately.
-
Stretch the turf
Pull turf tight across the installation area to remove wrinkles. A carpet kicker may be used if needed.
-
Secure perimeter
Use 5–6 inch nails spaced every 3–4 inches along edges.
-
Optional interior fastening
If needed, place nails every 12–24 inches across the field.
Important
Do not overdrive nails into the base. This can create visible dips and surface irregularities.
Apply infill to stabilize the turf, support blade structure, and improve overall performance.
Application Process
-
Pre-brush the turf
Use a push broom or power broom to lift fibers before applying infill. This helps the material settle evenly into the backing.
-
Apply infill evenly
Use a drop spreader to distribute infill across the surface.
-
Work infill into turf
Brush fibers upright to move infill down into the base of the turf. Repeat until evenly distributed.
- Use a push broom or turf rake
- Avoid metal tools to prevent fiber damage
Infill Coverage
- Typical rate: 1.5 – 2.0 lbs per sq.ft.
- Coverage: 50 lb bag covers ~25–35 sq.ft.
- Actual amount depends on pile height and turf density
Important
Do not use regular sand. Always use manufacturer-recommended infill materials to ensure proper performance and durability.
-
Final brush
Power broom or rake the turf to fully integrate infill into the backing and lift the fibers into a natural position.
-
Trim and inspect edges
Walk the perimeter and remove any excess turf to create clean, precise edges.
Site Conditions in Poway CA
The dominant soil profile in this area is classified as E20-maritime forest-organic slopes, with drainage rated as Well Drained. The soil in this area is a balanced mix of sand and clay, providing moderate drainage and stable conditions for installation.
As a result water may drain at a moderate and stable rate, depending on local weather conditions. This influences how water moves through the base and should be considered during installation planning. As a result, artificial grass installations in Poway, CA must account for both soil composition and real drainage performance rather than relying on texture alone.
Soil Composition in Poway
| Soil | % | Sand | Clay | Hydro | Drainage | Taxonomic | Group | Textures |
|---|---|---|---|---|---|---|---|---|
| E20-maritime forest-organic slopes | 85.00% | 67.40% | 13.00% | A | Well drained | Mollisols | Udic Haplustalfs | SL |
Climate & Rainfall Considerations
Poway, CA experiences peak rainfall of approximately 71.63 mm, with total annual precipitation around 322.56 mm. Combined with temperatures ranging from -1.87°C to 43.79°C, this creates conditions where both heat and moisture must be managed effectively.
Lower rainfall reduces drainage pressure, but proper base preparation is still required. High summer temperatures increase surface heat and material expansion. As a result, drainage design and base composition play a critical role in long-term turf performance.
Climate Summary in Poway
| Min Temp | Max Temp | Peak Rain | Total Rain |
|---|---|---|---|
| -1.87°C | 43.79°C | 71.63 mm | 322.56 mm |
Base Preparation and Installation Requirements
Due to the combination of E20-maritime forest-organic slopes soil and well drained drainage characteristics, base preparation must be adjusted to ensure long-term stability and proper water management.
A base layer of 3-4 inches using crushed angular aggregate is recommended to create a stable and well-draining foundation. This helps prevent movement, settling, and water accumulation beneath the turf surface.
In areas where drainage is limited, installing a geotextile separation layer can help prevent mixing between the subgrade and base materials, improving long-term performance.
Proper compaction to 90–95% in layered lifts to prevent settling is critical to avoid uneven surfaces and future shifting.
Sandy soils improve drainage but require stable compaction to prevent shifting.
Recommended Base Adjustments
| Material | Crushed angular aggregate |
| Top Layer | 1 inch 3/4" minus for compaction and surface stability |
| Depth | 3-4 inches (reduced due to sandy soil) |
| Compaction | 90–95% |
| Drainage Adjustment | Natural drainage sufficient, light slope recommended to handle peak rainfall of 71.63 mm/month |
Site Base Preparation (Detailed Steps)
Lay 3-4 inches of crushed angular aggregate as the primary base layer. This layer provides structural support and helps manage water movement beneath the turf surface.
Lightly hose down the aggregate if needed, then compact it using a vibrating plate compactor to approximately 90–95% compaction.
Weed barrier fabric is optional and may not be necessary where vegetation is minimal and the base is properly prepared. It is primarily used to limit weed growth beneath the turf rather than improve drainage or structural performance.
Install 1 inch of 3/4" minus for compaction and surface stability over the compacted base. This leveling layer helps create a smoother, more uniform surface before turf installation while maintaining proper drainage.
After the top layer is placed, lightly moisten if needed and compact again to approximately 90–95%. Make sure the final base surface is as level, smooth, and consistent as possible before turf is laid.
Compare soil and climate conditions across nearby locations.